Click here for photos of this build
Ryan lives in the greater Toronto area. He reached out to me last year about helping him build an acoustic guitar. He will be coming down for a couple of long weekends over the summer to get his guitar under way. He picked out some nice claro walnut for the back and sides and will be using Engelmann spruce for the top.
_________________________________________
Aug 25: We had a couple of hours this morning before Ryan headed home. That gave us just enough time to route the tail graft and make a curly maple wedge inlay. This is as far as this build will get this year. Ryan will resume the build next summer.
Aug 24: We had a bit of time this evening to lay out the binding and purfling and cut the channels with the router.
Aug 23: Pretty full day in the shop today. In the morning, Ryan glued on the upper transverse brace and remaining top braces. Once the glue had cured enough, we removed the top from the go bar deck to make room for the back. Ryan laid out the braces for the back then used a small saw and chisel to let the braces through the cedar reinforcement strip we had glued on earlier. The braces were then glued on with hot hide glue.
While the glue on the back braces was curing, Ryan got to work voicing the top. He used a chisel to carve a scallop in each of the tone bars, then slowly carved away wood from the other braces, tapping the top and occasionally checking how much the top was deflecting under a set amount of weight. Voicing took some time, and we stopped part way through and glued the back to the rims. Then it was back to voicing. Once we had the top dialed in, Ryan gave the top and bracing a good sanding.
Before calling it quits for the day, Ryan glued the top to the rims to close the box. Woot…woot!
Aug 22: Ryan is back in town for a long weekend to work on his guitar. The first visit to the shop was to layout the bracing pattern on the top and glue the bracing to the top. We got the X, tone bars, and finger braces glued to the top this evening.
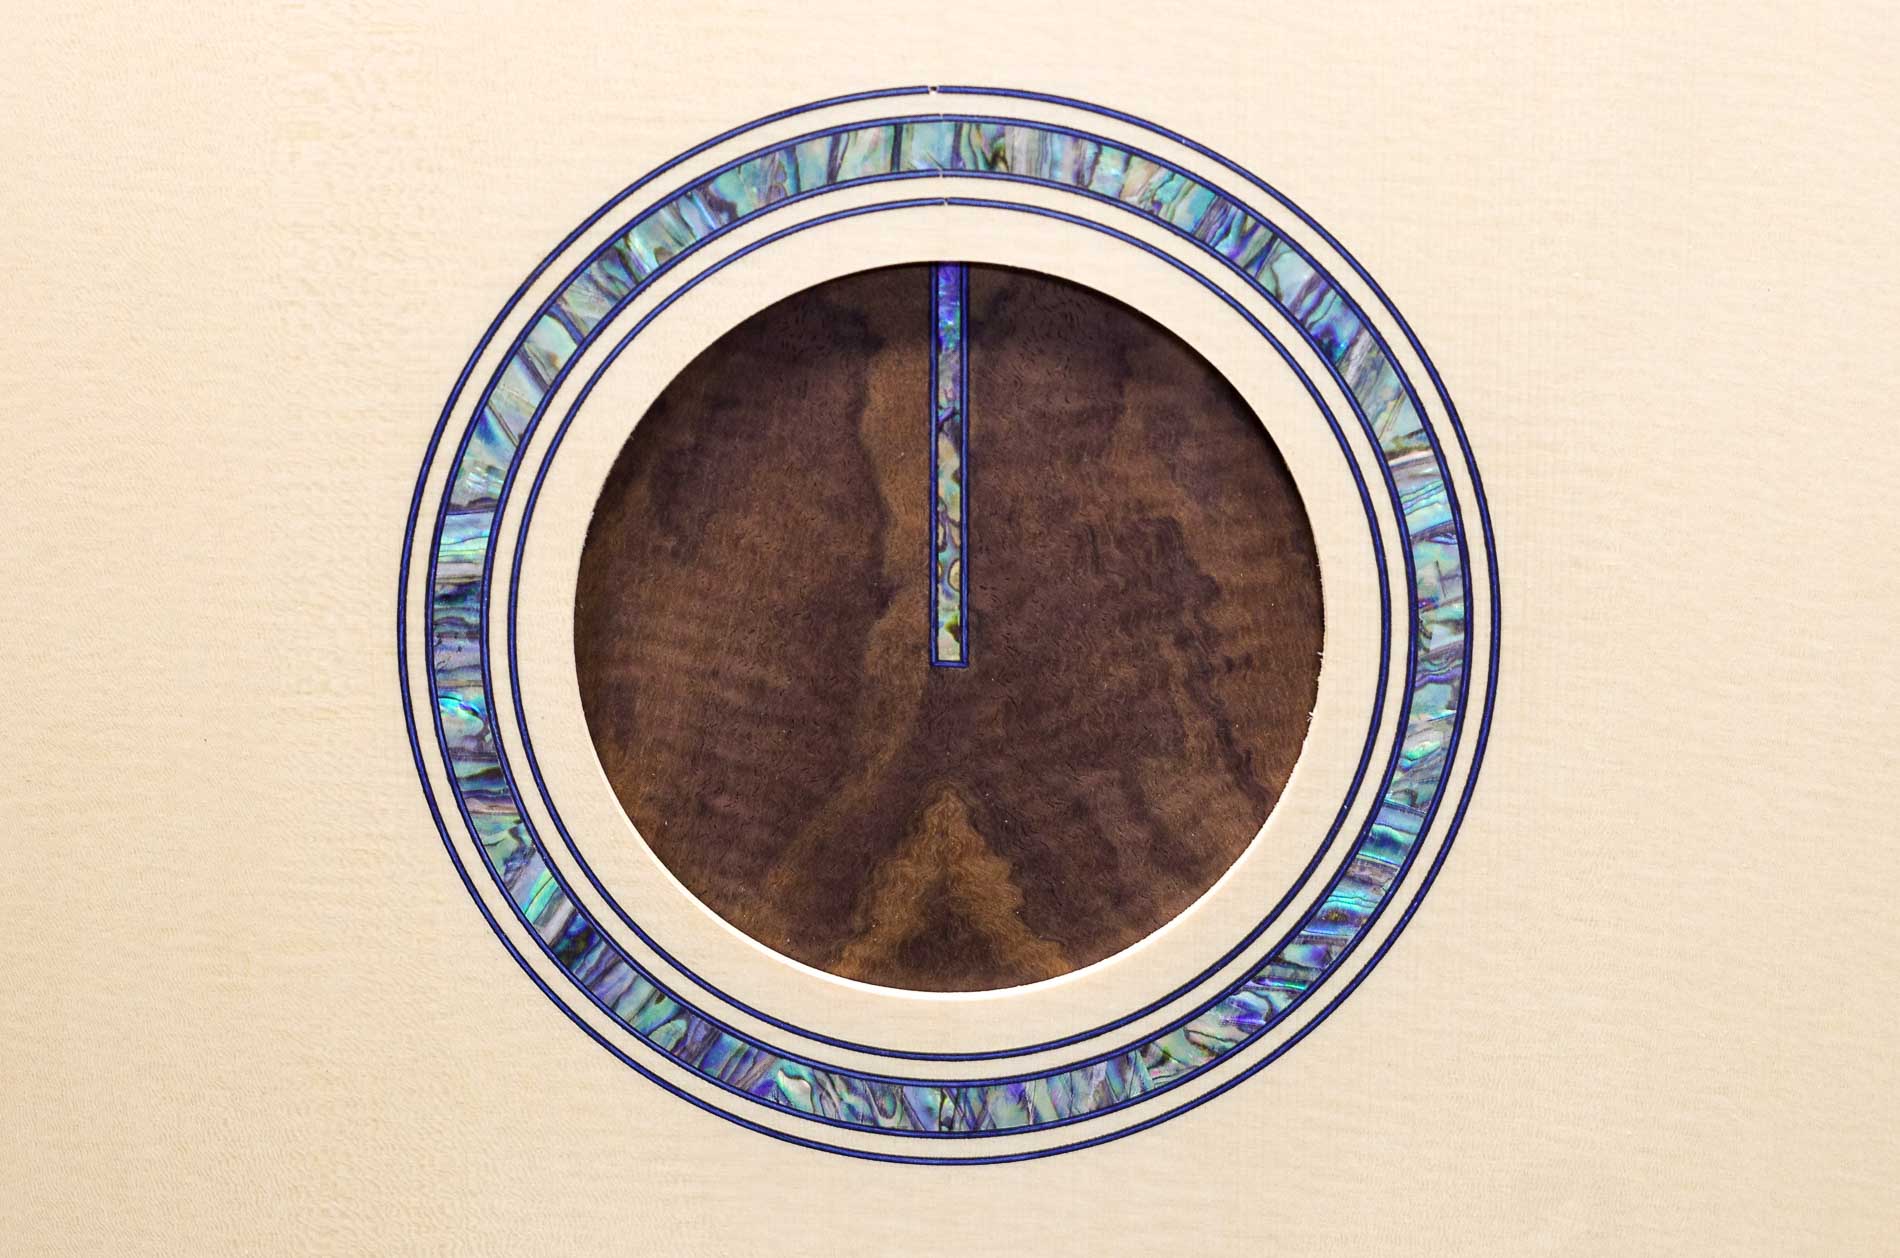
Jul 13: Ryan’s last day in the shop for this trip. Today, he used a plane and 15′ radius sanding bar to clean up the linings on the back of the rims and get it ready for the back. The top linings were sanded dead flat. To ensure the proper neck angle and avoid a hump on the fingerboard where the neck will join the body, Ryan sanded a bit of fall off to the linings from the sound hole to the neck block. Last task for the day was to run the top through the thickness sander. We made a couple of passes to clean up the rosette. Ryan then used the palm sander to clean up the scratches on the rosette side of the top. Once we were happy with the rosette and that side of the top, we flipped it over and ran it through the thickness sander, making several passes until we had the top down to the final thickness. We then took the top back over to the CNC and cut out the sound hole.
Jul 12: With the neck and tail blocks in, Ryan glued in the linings to provide gluing surfaces for the top and back. Ryan wanted a rosette with a single wide band of abalone with some satellite rings of black/blue/black purfling. Inlaying a rosette is most easily done using the CNC. We used the CNC to first cut the abalone pieces for the ring. We then mounted the Engelmann top on the CNC and first cut a channel for the abalone. Once Ryan had glued in the abalone, we had the CNC cut four more rings for purfling. Ryan glued in the purfling, and we set the top aside for the glue to cure.
Jul 11: We went through the flitch of claro walnut that I had previously sliced for guitar backs, and Ryan picked out a set for his guitar. We ran the plates through the thickness sander to get them to a consistent thickness prior to gluing. Ryan then glued up the back plates and put them in the clamping jig while the glue cured. While the glue was curing, Ryan made the neck and tail blocks for the rims. Once the glue had fully cured on the back, we ran it through the thickness sander to clean it up. Ryan wants an abalone strip inlay at the top of the back, so he inlaid the abalone and banded it with some black/blue/black purfling. Another pass through the thickness sander followed by some final sanding with the palm sander, and the back was ready for bracing. The last thing we got done today was gluing in the neck and tail blocks to join the rims.
Jul 10: We introduced Ryan to the shop and got started on his claro walnut Michigan. Today, we cut the profile for the sides on the bandsaw. We ran the sides through the thickness sander to get them down to a dimension we could bend, and Ryan cleaned up the sanding scratches with the orbital sander. We then ran the sides through the bender and clamped the bent sides to the building mold.


Leave a Comment